Like Natural? You NEED to Try This, Seriously!!!

So I know if you’re a reader of my blog that you’re health conscious and are a fan of things that are organic and natural. However, It is SO incredibly hard at times to find products that actually work and hold up to their “natural” marketing claims. What prompted me to take a deep look at all my beauty products recently is that I was diagnosed with a sunflower seed oil allergy. Yep, you heard that right SUNFLOWER seed! Little did I know that the products i’d been using everyday were causing me to get little itchy bumps all over my skin; no skin surface was exempt! These bumps are what prompted me to see an allergist in the first place which lead me to that surprising diagnosis. Anywho, to make a long story short nearly every product I owned contained sunflower seed oil aka Helianthus annuus. Let me tell ya, my mom made out on this allergy ordeal, she proudly inherited a boatload of skin, beauty and hair products….now I hope to heck she’s not allergic!

So there I was sans all my favorite products 😦 Needless to say during this whole process and after reading all the labels on my “natural” products quite intensely, I came to the realization that most of them weren’t “natural” after all and they actually contained quite a bit of ingredients you’d need a chemistry degree to decipher. After some perusing the internet I came across Shea Terra and my love affair began. I promise you I will make this love letter short and sweet 🙂

This company makes amazing and effective 99.7-100% ALL NATURAL products they also provide much needed jobs to communities in areas where their ingredients are sourced (such as Africa). The company also provides interest free loans to women living in those marginalized areas. So not only are you getting an amazing smelling, all natural, wonderfully effective products you’re also inadvertently supporting those in need! Win win!

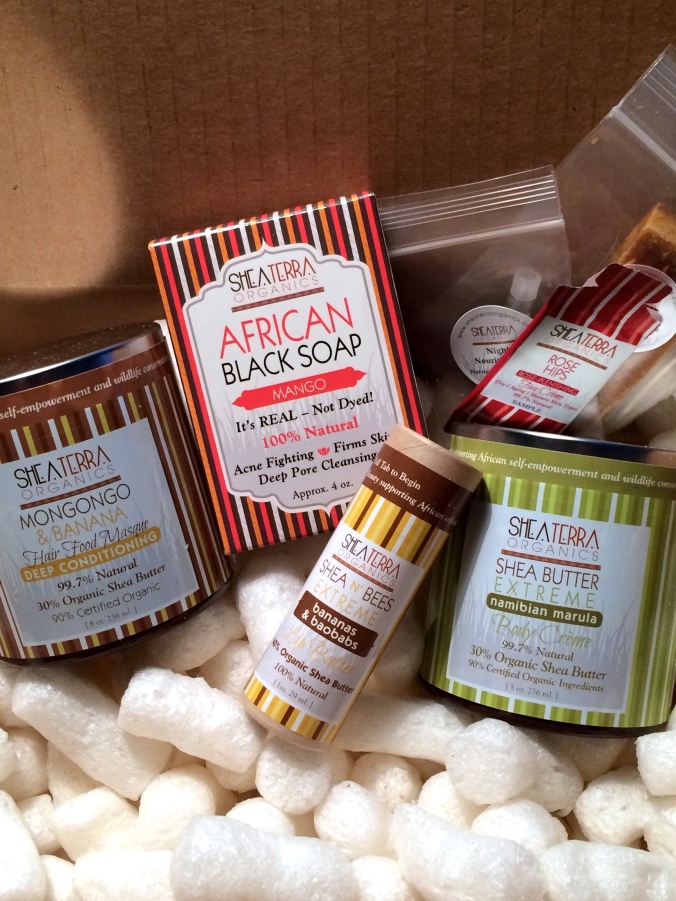
A small portion of what SheaTerra has to offer.

A small portion of what SheaTerra has to offer.

My favorite product is the Shea Butter Extreme Body Cream. It is incredibly versatile and not your average body cream. SheaTerra offers many choices in scents such as mango, pineapple, white chocolate, guava pomegranate just to name a few. All these scents are natural too, no fragrance, just pure simple natural scent. I use this product mostly for my cracked dry hands in the winter months. One application before bedtime and I wake up with soft nearly crack free hands!! My husband even used it once and commented on how awesome his hands felt. Secondly,  I love baths and I take about a tablespoon of this body cream and lightly rub it on my hands then put my hands beneath the stream of water thats filling to tub to add scent and moisture to my baths (it also creates a little bubble bath effect). This would be perfect to add to your little ones bath time regimen as childrens skin lacks an effective moisture barrier until about 5-6 years of age 🙂 A third way to use this body cream is to use it as a hair masque. Just take a scoopful and smooth it through your hair prior to shampooing, then shampoo as normal. Your hair will be shiny and soft due to the massive amount of shea butter in the product. I can’t express enough how incredibly fond I am of SheaTerras products and mission, Im pretty certain these are the only body care products i’ll ever be buying. Please SheaTerra, never go out of business, I love you!

Ok, now seriously ladies (and gentlemen too) check them out for yourself.
“Toe-mate-Os” or “Toh-mat-Os”…? Garden Planning Excitement!

It’s garden planning season!! One of my favorite things to do is to go through our seed catalogs and pick our lucky victims for planting in the upcoming year 🙂 We really love and have used Baker Creek Heirloom Seeds  since we’ve first started growing our own food about 5 years ago. This company has so many unique offerings and are 100% organic and GMO free, something my husband and I think is very important. I always get really excited about my tomatoes, I LOVE them and am always ready and willing to change the varieties up each season. Last year we planted a “Blueberry” variety from Baker Creek that were absolutely amazing, in addition to some San Marzanos and Striped Romans (good for canning, freezing, and slicing). This year I was lucky to find a small organic non GMO tomato farmer in Pennsylvania who I ordered all my “babies” from. As an added bonus the farm is called Happy Cat Farms !!! For a girl who loves her cats and tomatoes it was love at first glance 🙂

FullSizeRender

Happy Cat Farm Tomatoes!

Since our garden is fairly small, these are the varieties I’ve chosen. 

1. The Lloyd E. Frey– This is a great tomato for slicing. If you love beefsteak tomatoes, you’re guaranteed to fall in love with the flavor, texture and juiciness of this fella!

2. Sweet Pea– These tomatoes are VERY teeny tiny, the size of a pea! Why am I excited about something so small? Well, these little guys are the perfect addition to salads, a dish I enjoy almost every single day. They may be little, but they pack a nice sweet punch 🙂

3. Reigart– These medium sized tomatoes are GREAT for freezing and canning. Yes, you can freeze tomatoes and let me tell you, they are awesome to use in soups, stews, curries and sauces when you’re craving the flavor of freshness over the long winter months.

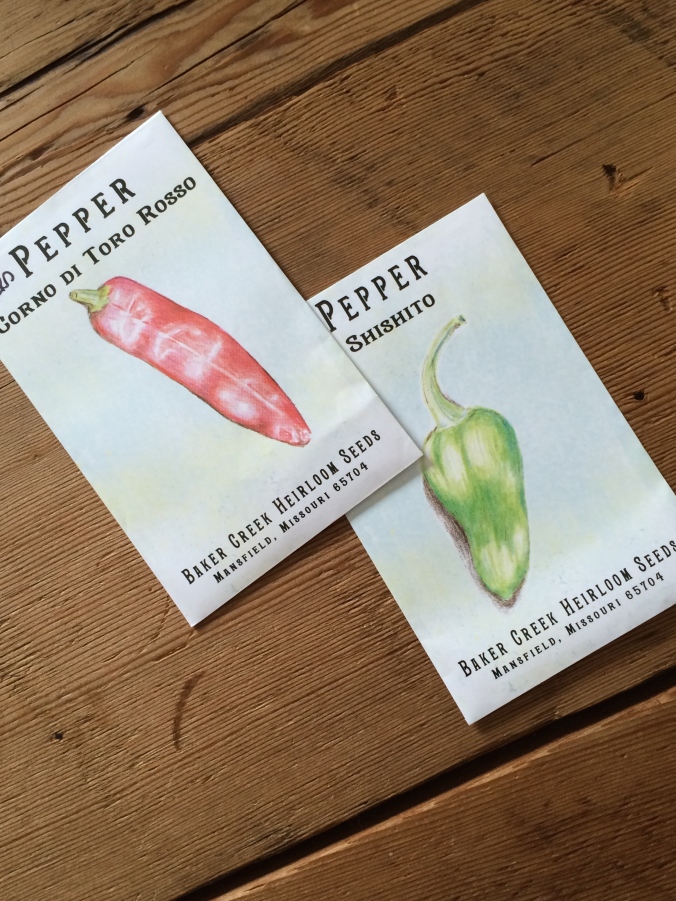
Peppers!

Peppers!

In addition to the awesome tomatoes, I’m also pretty excited about these peppers. I’ve never planted the Corno Di Toro Rosso peppers but have heard they are a great and sweeter alternative to bells, especially great for pan frying due to the thinner skin.

Each year my husband and I plant Shishito Peppers. OMG are they amazing! They are tiny little peppers that when simply sautéed in butter with salt are the most amazing little treat you can have. They are a sweet, slightly smokey, very mild pepper that grows amazingly well and produces a significant yield when pruned properly. I would recommend these to anyone who loves a good pepper, even just one plant can give you a good amount to enjoy.

Homemade Garden Markers.

Homemade Garden Markers.

Lastly, my very talented sister in law made my husband and I these really unique garden markers for christmas. She hand fire etched each name of the plant onto the wood and soaked them in linseed oil to help seal and protect. This is such a great idea that will add a great look to our garden, and the smell of the linseed oil will deter little critters from the plants 🙂 Win win!

Fragrant Homemade Fire Sticks!

Fall here is alive and well and soon enough were going to have LOTS of snow as usual. To me this conjures up warm and fuzzy feelings. I love fall, its colors and scents but I really love the first big snowfall! Its so white and beautiful and always brings a smile to my face 🙂 Plus, I LOVE enjoying cozy fires with a good book and a cup of hot cocoa. Ahhh, can’t wait!  Anywho, this year after trimming my lavender plants in preparation for winter I kept thinking “theres got to be something I can do with the trimmings instead of just throwing them out” wouldn’t you agree? So here it is….fire-sticks! These awesome little bundles smell amazing and will also help in starting a wood burning fire.

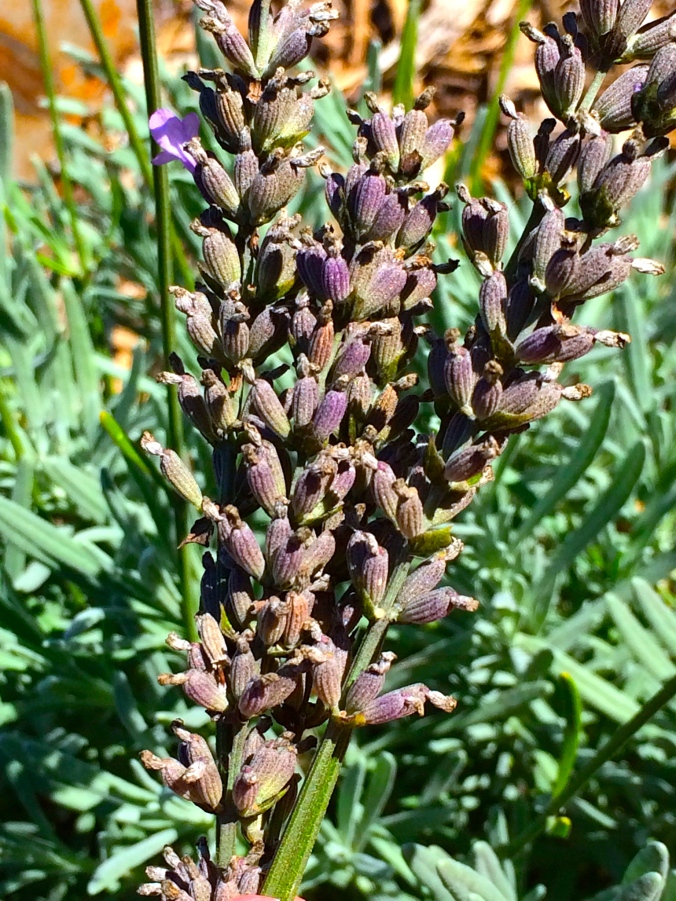
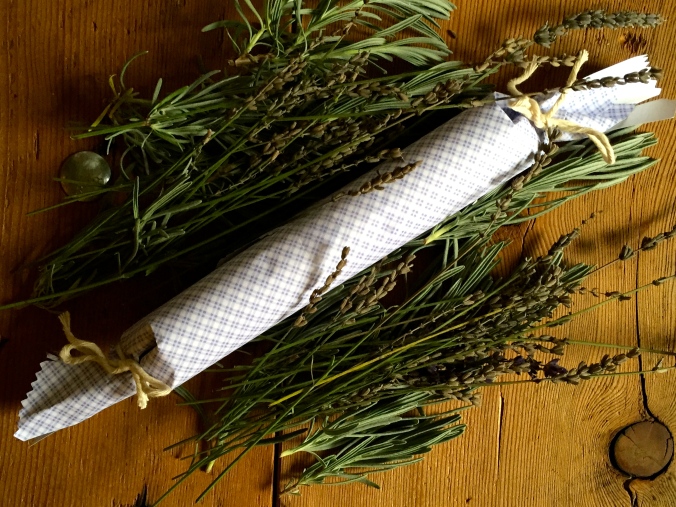
French lavender at the end of season is very dense and woody but still very fragrant, perfect for firesticks

French lavender at the end of season is very dense and woody but still very fragrant, perfect for fire-sticks!

Up close of the dried spent lavender blooms.

Up close of the dried spent lavender blooms.

What you should do first is clip as many of the blooms as well as the foliage you desire. One average sized plant will render about 2 dozen fire-sticks.

After you’ve gathered all your clippings, you can wash them and leave them out to dry (optional).

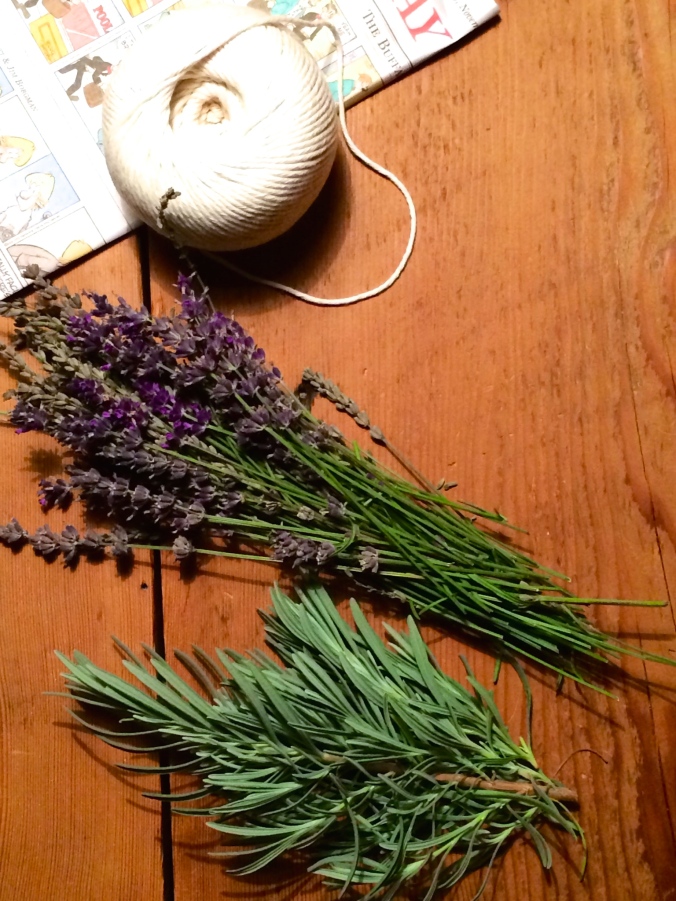
Next, the supplies you will need are:

-Your clippings

-Scissors

-Twine

-Newspaper or another type of paper

-Any other additional herbs you’d like to add (Sage, thyme, marjoram, rosemary or chamomile are great options!) I decided to add some cinnamon sticks to the mix 🙂

Just a few of the supplies needed.

Just a few of the supplies needed.

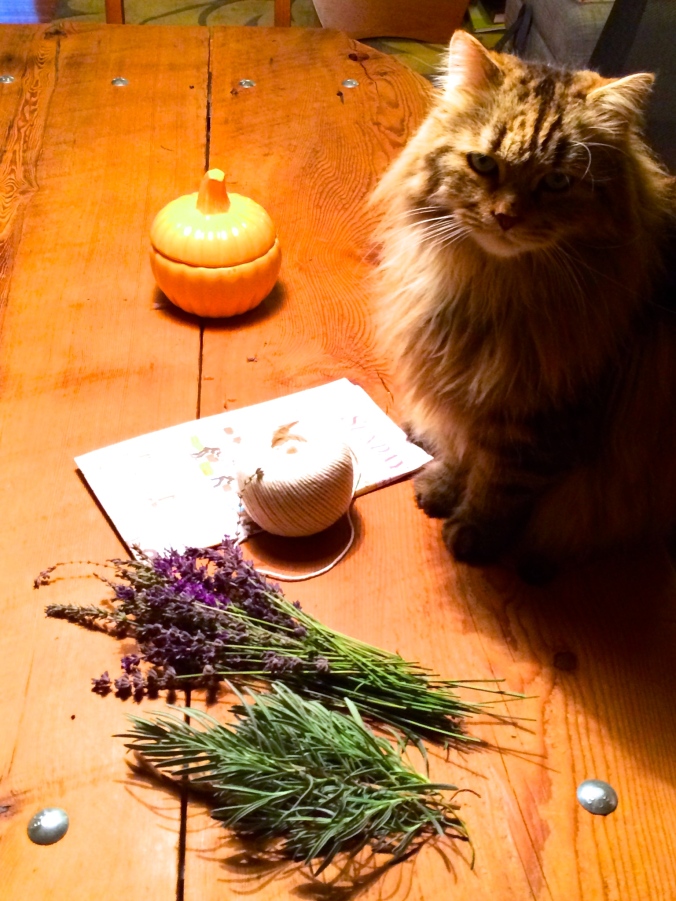
And it’s always nice to have a helper! In this case….my cat Feliks insisted he be present for this project! Ha.

Feliks the "helper".

Feliks the “helper”.

After you’ve gathered all your supplies cut your paper into squares and cut two twine pieces for each square. To add a little extra “fun” you could used scalloped scissors on the corners of each paper square to create an interesting look.

Then place your herb bundle towards the edge of one corner.

Squared paper with scalloped edges with herb bundle.

Squared paper with scalloped edges with herb bundle.

IMG_3759

Close up….just for fun 🙂

Now start rolling the paper into a long tube like shape.

Rolling the lavender bundle.

Rolling the lavender bundle.

If your paper is thicker you can secure its closure with a little piece of tape.

Next, if you’re using thicker paper like I did you’ll have to cut into each end so that when the twine is tied the ends don’t get completely smashed in. If you don’t really care, you can skip this step.

Cutting into each end of the bundle.

Cutting into each end of the bundle.

Now tie each end of the bundle off with some twine…..and there you have it, you’re done!

Finished lavender cinnamon fire-stick!

Finished lavender cinnamon fire-stick!

Next step…..toss with some kindling, start a fire and enjoy 🙂

Four Years and Counting…….

So sorry for my couple week long hiatus, I’m sure you all can relate when I say things got too busy around here and the blog fell  off my radar for a bit. Whoops! No worries though….I’m back 🙂

4929441811_a447546f50_o

The quaint little sign welcoming guests to our backyard garden wedding which took place in Toms parents yard.

Yesterday my husband Tom and I celebrated our four year anniversary. It amazes me how time truly does fly. What also amazes me is how reminiscing on past events both big and small makes you realize how much has culminated in a seeming short period of time. Many things change, but yet many things stay the same. Every single day no matter how mundane something awesome happens, we grow, we learn, and we change. Each little experience of our lives changes us in some small way leaving us just a little different than the moments before. I now realize that my definition of love is sharing these moments, learning, and living these moments. Tom and I are not the exact same people we were four years ago and this is what I love about us. The old adage of “don’t ever change” that is often said as a phrase of endearment are words we’ve NEVER spoken to one another. Without change we become stagnant and boring and thats certainly not the story we want to write. 🙂 I encourage everyone to embrace changes both big and small, learn about yourself and your loved one you might be surprised at what you find.

One of my favorite photos on our wedding day. Taken at an old train station in our hometown.

One of my favorite photos on our wedding day. Taken at an old train station in our hometown.

My favorite photo. Taken at Toms parents neighbors house. Their horse was soooo good! I was pretty nervous sitting like that.

My favorite photo. Taken at Toms parents neighbors house. Their horse Kobe was soooo good! I was pretty nervous sitting like that. Do you like my wedding shoes? Birkenstocks, still have them, still wear them 🙂

To end, here is one of our engagement photos. Taken in a hanging bog. Yes I am wearing waders and in the water holding some seaweed. Perfect!

To end, here is one of our engagement photos. Taken in a hanging bog. Yes I am wearing waders and in the water holding some seaweed. Perfect!

Xoxoxo,

Jillian

Garden Happenings

Summer is in full swing here and so are the visitors to my garden!  Both the good and the bad. First the bad….mites…what I think is the two spotted spider mite-yuck! First noticed these little buggers two years ago in my garden up front after I saw them crawling on my lawn furniture.  Now they are in our back garden and again, I only noticed them after I saw them crawling on our furniture during a windy day. Have a feeling the host plant may be our tomatoes. If anyone has any organic solutions that have worked for you, please share in the comments!!!  I want to at least reduce the population so I can sit outside without them crawling on me. Ick. I know how incredibly hard they are to eliminate though.

Ok now onto the good visitors! Earlier in the season I noticed multiple baby praying mantids in the garden. This made me incredibly happy because these are the good guys!  They eat mites and aphids and not to mention they are so cool to watch:)

photo 2

Baby mantid on my hydrangea earlier this year.

image

Bigger mantid trying to make its way up the side of my house. Hummm I wonder whats up there? 🙂

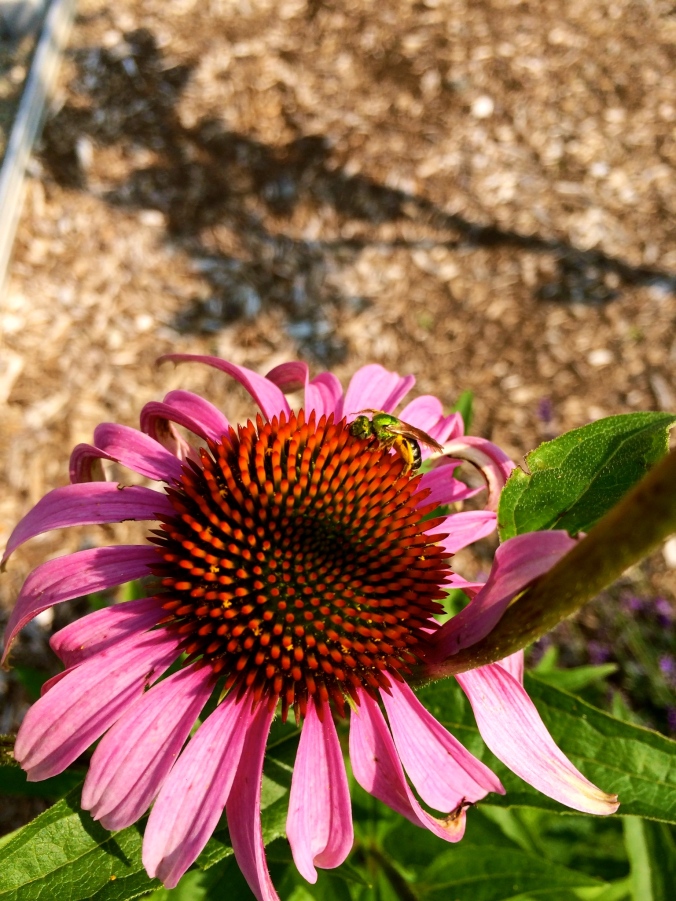
I also noticed this funky little bee early in the morning one day. What caught my attention was the neon green coloring. So of course I googled it and what I discovered was that it is called a sweat bee, interesting. They are nocturnal bees that are generally attracted to the by products of perspiration hence the name the sweat bee.  Although this little guy was more interested in my cone flowers more so than me. Perfect!

photo

Sweat bee on cone flower.

image copy

Sweat bee on coneflower. Notice the bright green coloring and the very yellow legs! Very cool to watch.

My husband and I harvested our first round of shishito peppers a few weeks ago, and since then have harvested at least three more batches. If cared for and pruned correctly these peppers just keep on giving. They are also amazingly delicious, not spicy and easy to prepare. Just put them in a skillet with a little bit of butter or oil, salt and pepper and pan fry them till the edges are slightly charred. Enjoy them by grabbing the stem and plucking the pepper off.  These are a great appetizer and the aroma they give off smells like fresh buttered movie style popcorn!!

shishitos copy

Beautiful shishitos…oh how I love you.

Heres something fun….these crazy little finches visit my feeders everyday. Each of them has such a personality. There are a few birds that decide to eat upside down when the feeder gets low. It cracks me up every time!

image

Mr. Finch on the right hanging on for dear life just so he can eat some nyjer seed!

Lastly, one afternoon I was sitting outside and noticed a beautiful orange fluttering. Initially I thought it was a red admiral butterfly (I had been seeing tons of them lately) but as I watched it land I quickly realized it was a monarch!! Just beautiful. Since then a number of different monarchs have been visiting my flowers for the sweet nectar. They really love my zinnias!

image 2 copy

Monarch butterfly visiting my potted zinnias. Just look at that incredible design. Nature amazes me sometimes.

Till next time….

Drab Bathroom? Spruce It Up!

The bathroom is my least favorite room in our house.  Its old, small and generally blah. However, it’s visited often and is the one room in the house that you can be sure guests will visit, so of course you want it to look nice. So what can you do aside from a full remodel to spruce things up and make it more interesting and aesthetically pleasing? Heres what I did…..

1. Add a punch of color and pattern! It visually draws interest and focuses attention away from the rooms less than desirable features.

image 2

This is my funky little shower curtain.

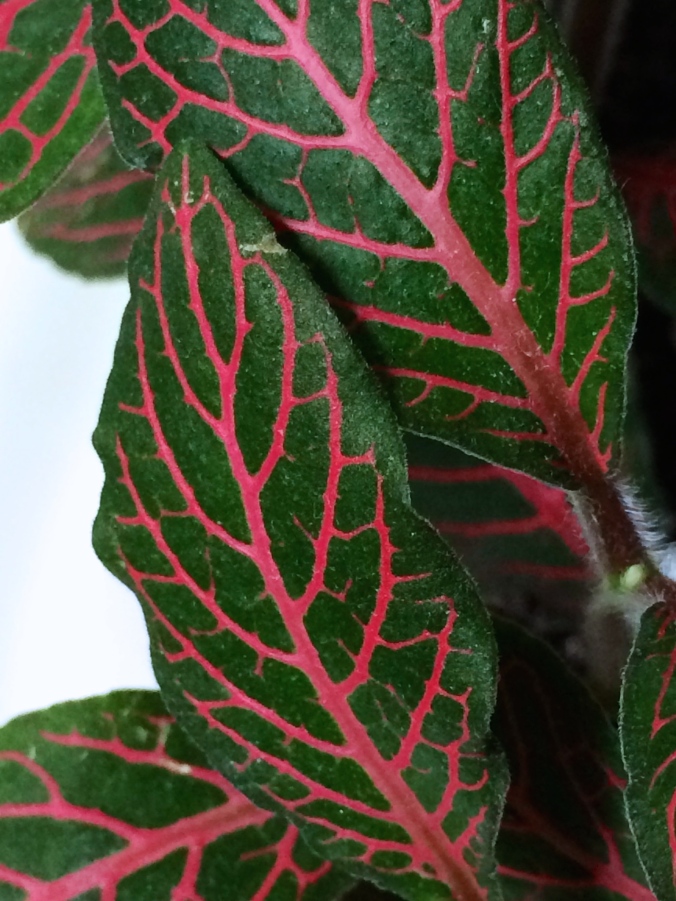
2. Add an interesting plant. Plants do a wonderful job of purifying the air and in addition usually do really well in bathrooms because of the amount of humidity they get everyday.  I have a Fittonia plant otherwise known as “the nerve plant” due to its leaves that resemble the human bodies network of branching nerves.  Considering I’m in the medical field, this plant is perfectly appropriate 🙂 In addition, it is a humidity and water hog and thrives in the bathroom environment with indirect light.

photo 2

My little Fittonia happily thriving on the bathroom countertop.

image

Close up of the “nerves”.  How cool are these leaves?!

3. Add something unique. It can be a picture you took yourself of something you love. An interesting book. A relic you’ve picked up on a trip, or just something fun like this q-tip holder I picked up on a recent trip to Philadelphia.

IMG_1307

I crack up every time I look at this hedgehog. I think it’s so adorably cute!

4. If all else fails…..you can always add a cat! Hahaha, just kidding. I had to add that because my cat Feliks is looking ridiculously handsome in this picture and I needed a good excuse to post it 🙂

photo 3

Our Siberian cat Feliks. Isn’t he handsome?

Thats all for today! Happy sprucing up 🙂

Modern Simple Succulents

photo 4

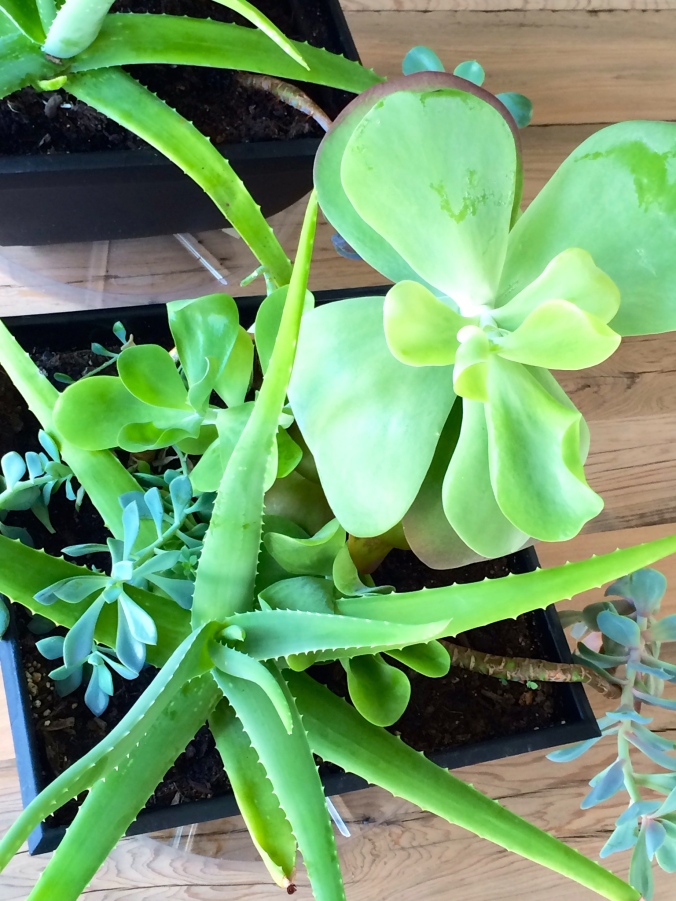
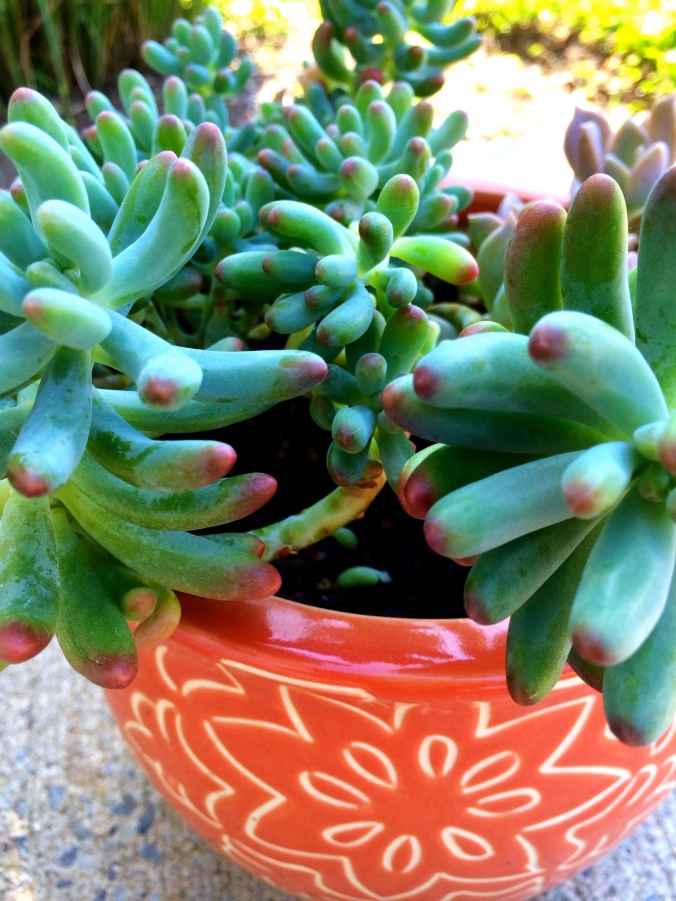
One of my favorite displays of potted succulents accenting our backyard dining table.

If you ask me, succulents are one of the most incredible looking plants around. They add unique pops of fresh color and texture to both pots and landscape. As an added bonus, they are super easy to care for! Many are intimidated by succulents because they think they require special care, but succulents are probably one of the easiest plants to keep and are very rewarding. If cared for correctly succulents will last a lifetime. No joke. Here are some simple tips for planting and keeping succulents.

Tips For Planting and Caring for Succulents:

  • Succulents can be purchased at almost any nursery and often can be found at big box outdoor stores as well.
  • When planting succulents make sure to use a pot with multiple drainage holes. Succulents will rot easily if they are left to sit in damp soil.
  • Use a potting mix formulated especially for succulents or cactus. You can also make your own by using regular potting soil mixed with sand and small stones for easy drying and drainage.
  • Now that you’re ready to pot, pot succulents as you would any other flower. Gently manipulate the roots, place in pot or ground and cover roots with soil up to the base of the succulent.
  • DO NOT WATER succulent immediately as you would regular potted plants. Wait 24 hours and then provide the succulent with a light watering. Thereafter you only need to provide a light soaking of water every 2-3 weeks.
  • Most succulents thrive in sunlight with the exception of a few varieties. So indirect sunlight is usually a safe bet.
  • Lastly, there is no need to fertilize your succulents they tend not to handle the excess nitrogen well.

There you have it, all you have to do now is enjoy!!!

photo 5 copy

Some seriously large and old growth succulents I inherited from my husbands grandmother. Are they not stunning?!

photo 2

Here is a simple unassuming succulent display I have near my front door entrance.

photo 3

A close up of the rubbery leaves.

photo 5

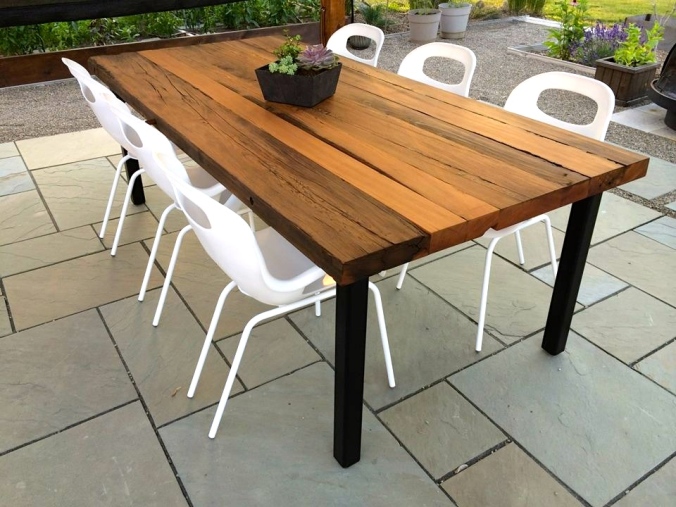
Simple succulents resting on unfinished ash tree table in the backyard.

My favorite bunch of succulents making the backyard table (which my hubby made out of repurposed wood) look even more amazing.

Keep posted for a feature on our transformed backyard that my husband built himself from the ground up 🙂 


Paleo Pumpkin Custard Cups

Are you looking for a dessert that is quick, easy and nutritious?  Can’t be true right?  Nope, it’s true!! These pumpkin cups are amazing. You MUST try them. Pumpkin is a great source of dietary fiber and pure maple syrup (not the fake kind) is loaded with over 50 compounds that help regulate blood sugar, decrease inflammation and even help ward off cancer forming cells. Im not saying that you should chug pure maple syrup everyday, but you may want to consider replacing table sugar and other sweeteners for it (of course, if you are diabetic please consult your practitioner first). My mother in law first introduced me to these scrumptious desserts a few months ago and since then i’ve made countless batches tweaking the recipe each time till I found the best balance of flavors. Here it is 🙂

Paleo Pumpkin Custard Cups

1 can pumpkin

1 can coconut milk

1 tbsp vanilla extract

1/2 tsp nutmeg

1/2 tsp ginger powder

1 tsp cinnamon (you can add more if you really like it! I usually do.)

2 eggs

pinch of salt

*You will also need 4 or 5 small ramekins and a baking pan big enough to fit the ramekins in.

 Start by preheating the oven to 350 degrees.

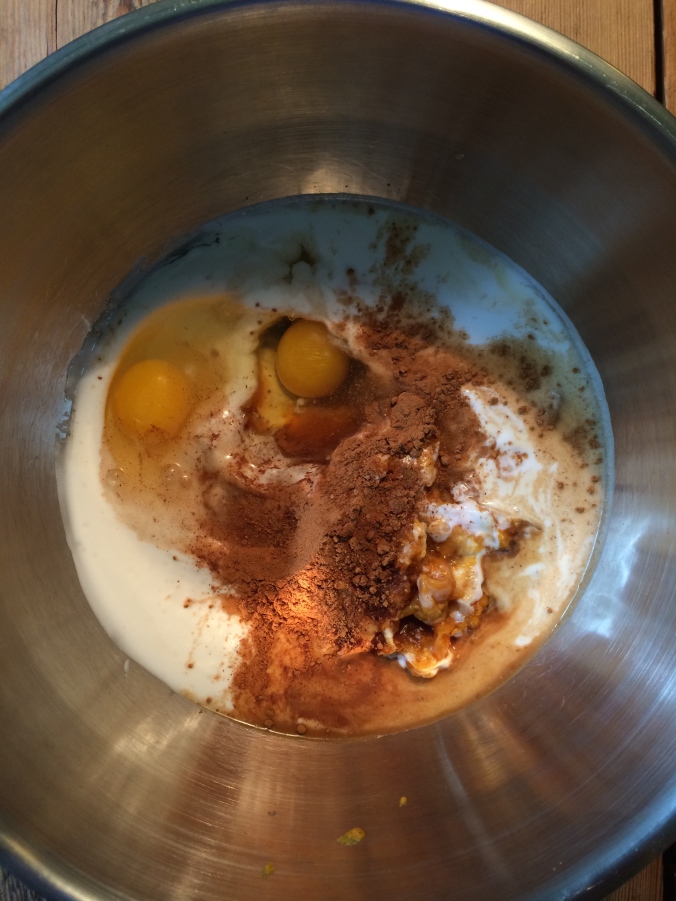
Combine all ingredients in a large mixing bowl.

photocopy

 Mix away!

image

Place ramekins inside baking dish and fill with the pumpkin mixture. After the ramekins are full, fill the baking dish with an inch of water. This helps to not dry them to a crisp in the oven 🙂

image 2

Place in the oven uncovered and bake for 90 minutes. Keep in mind cooking times may be less if you have shallow ramekins. When they are done they should  be somewhat firm to the touch and have a very small amount of browning on top. I like to shave a little bit of maple sugar on top right before serving-yum! They can be served hot or cold. Enjoy!!

image 3

One Pretty Awesome Sunscreen!

If you are anything like me, 20 minutes in the sun will leave you with some sweet tan lines and a nice burn. I guess thats what predominantly german genes buys me :). On a beautiful day you really don’t want to spend most of the day indoors, you want to enjoy it right?! Me too! With that said, we all know it’s pretty darn important (especially for the fair skinned) to slather up with sunscreen before enjoying some fun in the sun, even if its just sitting on your patio with a good read. Unfortunately, most sunscreens leave you either feeling massively sticky, greasy or white as a ghost (thank you zinc oxide). This is even more true if you like to stay away from the chemical based sunscreens and stick with the mineral based ones. I am all about natural, you all know this, but I just cannot get over the white look and the heavy feel of the mineral sunscreens which use a combination of zinc oxide and titanium dioxide to block UVA and UVB rays. If you feel the same way I’ve got a solution! I present below Coola Classic sunscreen for the body and for the face :). The only sunscreen I am willing to wear every single day.

photo 6

This sunscreen utilizes organic ingredients, is broad spectrum with an SPF of 30 and is oxybenzone free!!!  Whats oxybenzone you ask? Well, its a very common ingredient in mainstream sunscreens that has recently been suspected as hazardous to the body. It is correlated with endocrine disruption, cellular dysplasia and photoallergic skin reactions. Why use a sunscreen that contains it if one without works just as well?  In addition, Coolas sunscreen is NOT at all greasy and smells amazing! It offers a silky smooth feel, mostly organic ingredients and broad spectrum SPF coverage. It is a little pricey for a sunscreen but in my opinion is 100% worth it. Give it a try, you can thank me later 🙂 http://www.coolasuncare.com